Making Sourdough Work for You, and Not the Other Way Around, Part 2
This post contains affiliate links.
As I discussed in Part 1 of Making Sourdough Work for You, and Not the Other Way Around, I maintain 2 starters, that are discard free. I’m actually starting a third starter, just for purposes of this blog. In any case, I make 2 of these loaves every week, along with a batch of English Muffins. I love how soft and pillowy the crumb of this loaf is, and how crisp the crust is. It is the only bread we use, but it works exceptionally well for grilling, when brushed lightly with extra virgin olive oil. This bread works great for toast, dipping and sandwiches.
Just as I did in Part 1, I will detail how I make baking sourdough work for me. I’m busy, I work full-time, and I’d guess that you are too, there’s no reason to cancel plans to make a tasty loaf of bread. Unlike Part 1, maintaining a sourdough starter, for this recipe, you will need some equipment.


- A digital kitchen scale, that has a tare function and the ability to change the units of measure. The Nicewell Food Scale is my personal favorite, and it’s a great price. I just changed the batteries in this scale, after having it and using it weekly for just shy of 2 years.
- A large glass, ceramic or non-reactive metal or plastic bowl. I’m a huge fan of Anchor 4 QT Glass Mixing bowl, as the sides are taller than they are wide, making it easier to gauge how much the sourdough has risen.
- Banneton, lame, and dough scraper. You do not, absolutely need these items, but they make refrigerating your loaf, scoring your loaf, shaping your loaf and cleaning up, significantly easier. You can use a floured towel lined bowl for refrigerating your loaf and typical method for cleanup. For scoring your loaf, you can use a sharp knife, but I find that the lame provides better control.
- I find it easiest to cover my banneton and glass bowl with a reusable plastic shower cap, it keeps moisture in and everything else out, during bulk fermentation and in the fridge. Plus, these are washable and all you have to do is hang dry.
- A cast iron Dutch oven and amazing parchment paper are needed to make the loaf spring up and to get your loaf in and out of the Dutch oven.
This Loaf is the beginning for any loaves I make that have toppings, fillings and even cinnamon rolls. There are some changes that I make to this loaf, but for the most part, the basics remain the same. I love experimenting with food and sourdough is no exception.
Let’s Start with the ingredients.
- 100g Active (or Fed) Sourdough Starter
- 20g Olive Oil
- 280g Warm Water, 100-110 F
- 500g Bread Flour
- 12g Salt

Now, what to do. I know that what you are about to read is a lot of information, and you’re probably wondering “how can I make this work for me?” I assure you, no matter how much information and steps exist below, you can make it work for you! I will completely detail my experience below these instructions.

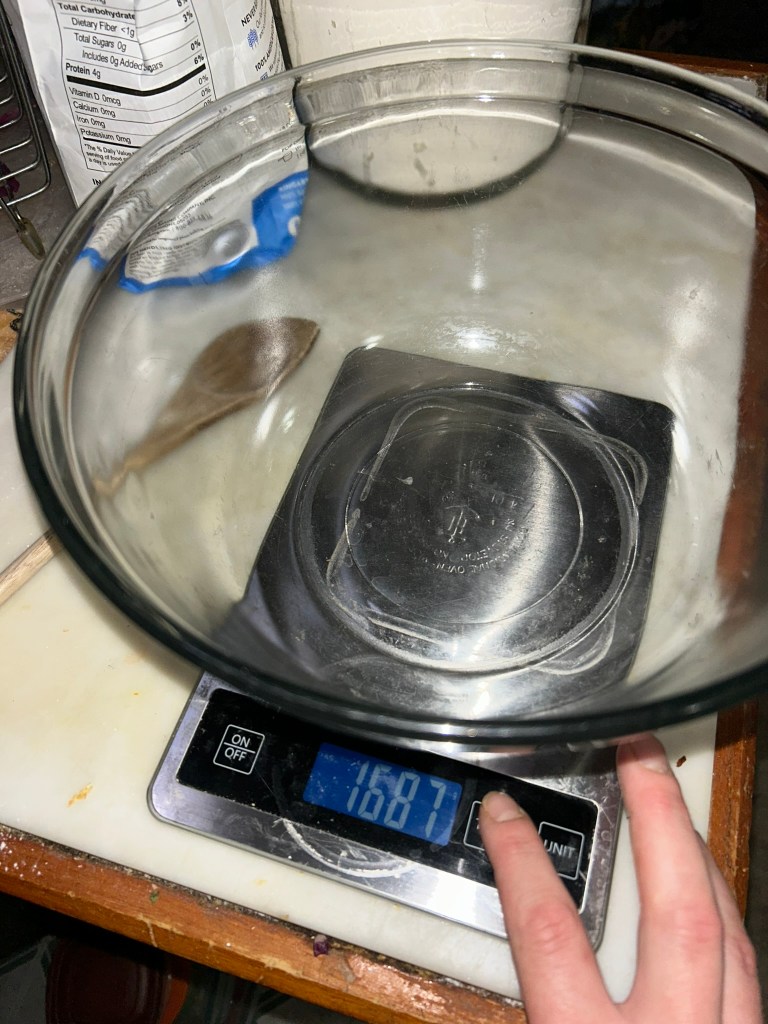
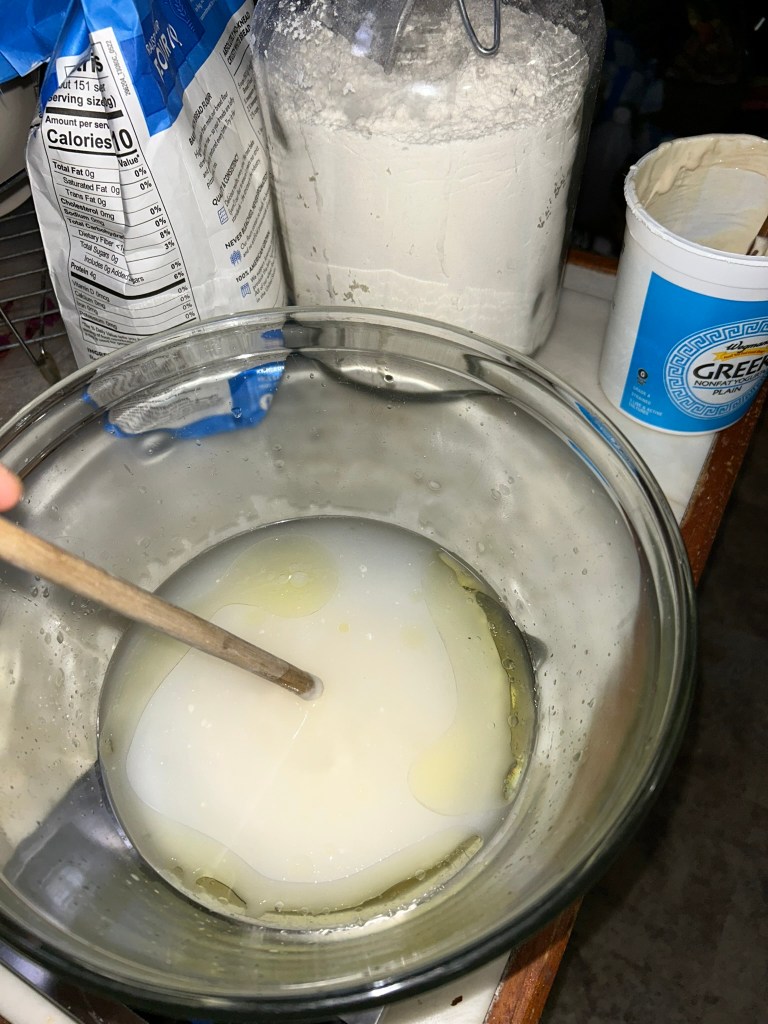
Step 1: Add your starter, olive oil and water to your large glass bowl, using the tare button on your scale in between each addition and after setting your bowl onto the scale. Mix, until the starter has dissolved into the water.
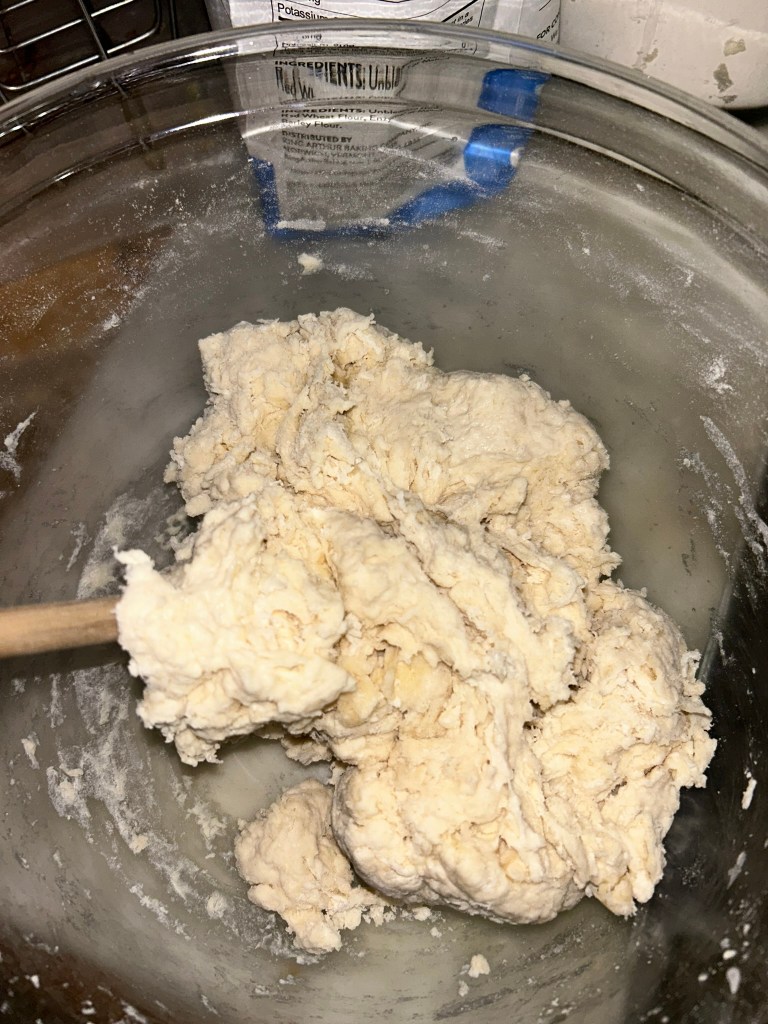
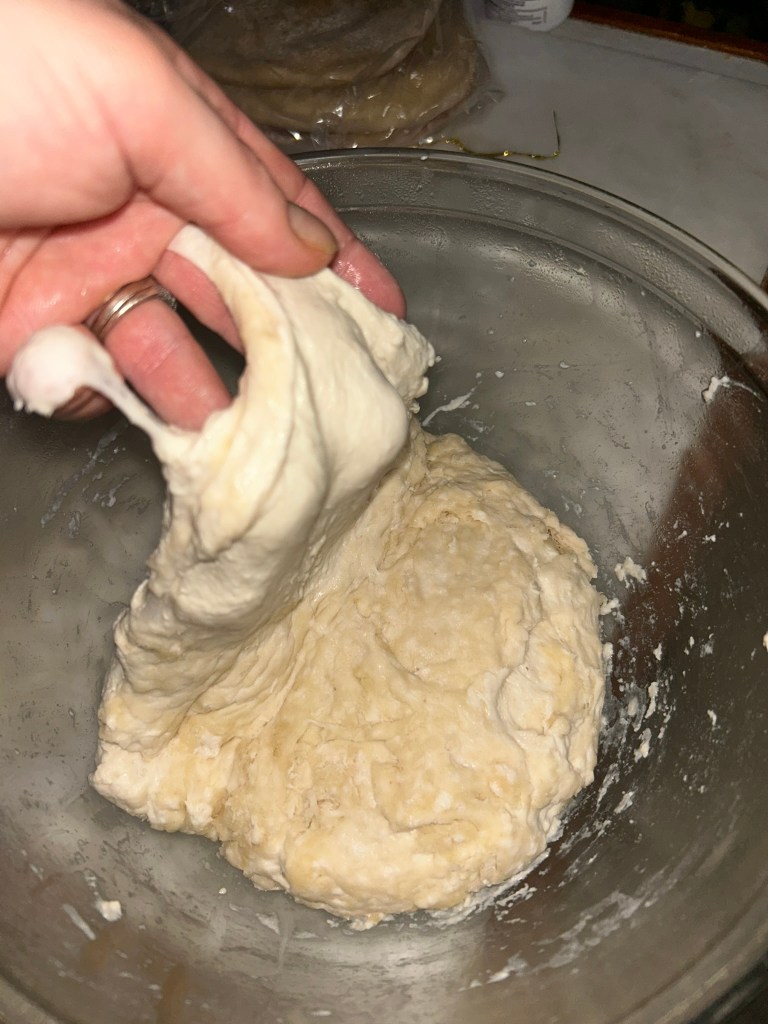
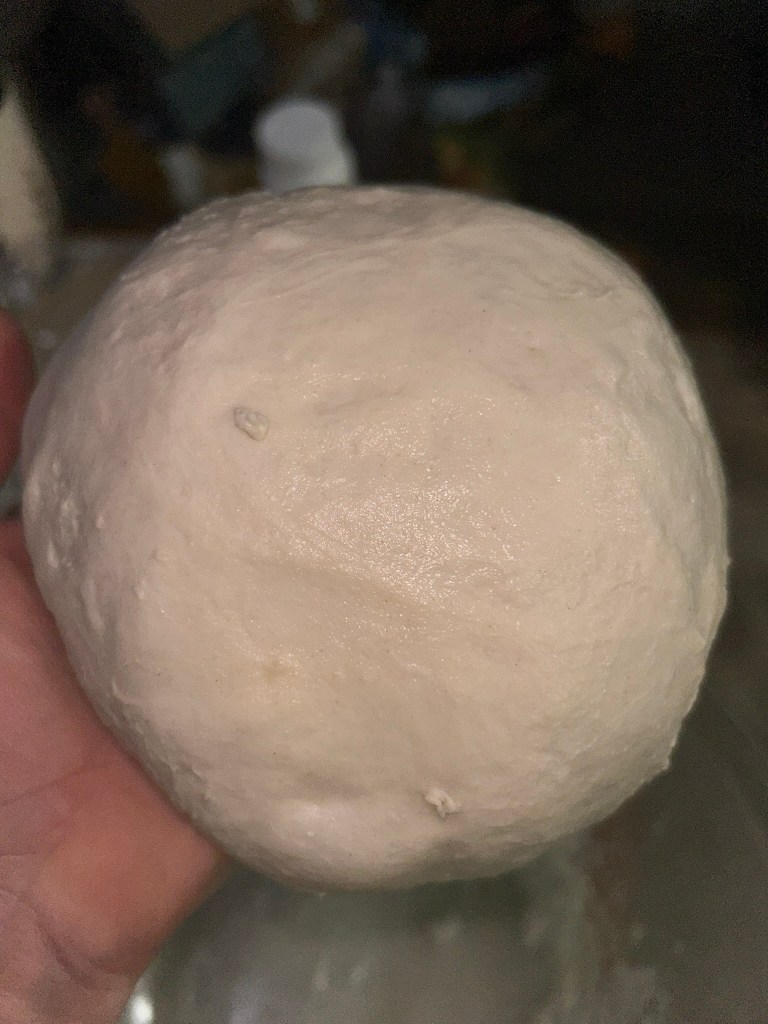
Step 2: Tare your scale, again before adding your flour and once more, before adding your salt. Mix everything together. The dough ball that forms is going to look a little rough and that is totally normal, simply wet your hands and gently form your rough dough ball into an actual ball.

Step 3: Cover and rest your dough for 1 and a 1/2 hours. Set a timer on your phone!! This is the perfect time to wash dishes, relax on the couch, whatever you want to do. I usually make and eat my dinner.
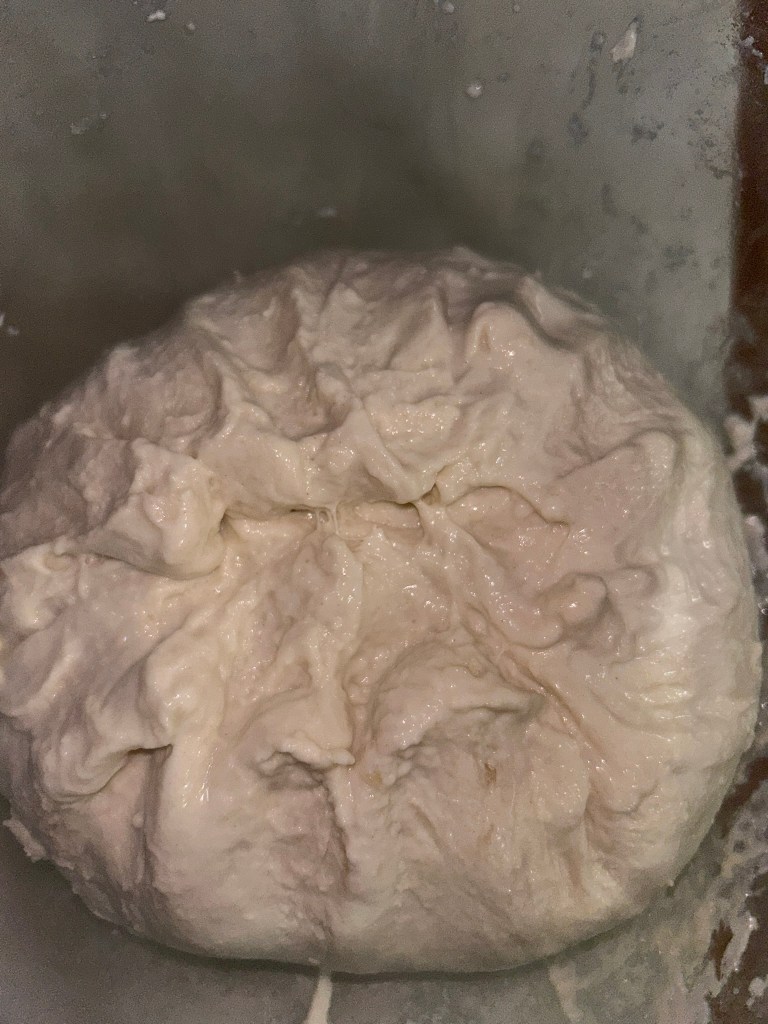
Step 4: After your dough has rested for 1 and a 1/2 hours, it’s time to preform your first set of stretch and folds. During this first rest period, your dough ball is going to relax and flatten out, this is normal. Stretch and folds, work exactly like they sound, your going to grab a section of dough, stretch it up until you reach the opposite side of the bowl, and gently set it down onto the loaf. Then, turn the bowl 90 degrees and repeat 3 more times. You will likely end up with a rectangular dough ball. After the fourth time, turn the bowl 45 degrees, to the corner of your dough ball and repeat the cycle of stretch and folds at each corner.
Step 5: Cover and rest for 1 and a 1/2 hours. Don’t forget to set a timer on your phone!!! Now go wash some more dishes, do some laundry, take a shower, whatever you want. There’s no reason to stand over and watch your dough every moment, you know the saying “a watch pot, never boils”, so get on living!
Step 6: Repeat Step 4. Placing the seam side down, into the same bowl.
Step 7: Cover and rest overnight or 8-12 hours. This rest period is called bulk fermentation. Bulk Fermentation has a varied time, and it is all depending on the temperature of your house. A cooler house will cause the dough to rise more slowly, and a warmer house will cause a faster rise. Ideally, you are looking for the dough to have risen to nearly doubled. My house is usually around 70F and it takes my loaves 8 hours to reach this point. Pro Tip: My favorite sourdough hack to use, if my house is hot, is to use cold water when I am making a loaf. This helps to slow the yeast growth, as everything will need to warm up.
Step 8: The next morning, you will shape your loaf and place into the banneton, cover and refrigerate for 6-8 hours. To shape the loaf, wet your hands and gently push the side of the dough, between the bowl, down and under the dough ball, until the loaf is free from the bowl. Now, gently tilt the bowl and slowly dump your loaf into the banneton, the seam side should be on top. Gently close the seam, cover the loaf and refrigerate for 6-8 hours or overnight. This is a complicated step, I have a video below.
Step 9: After 5-7 hours have passed or first thing the following morning (Day 3), preheat your oven, to 450F with the Dutch oven (with lid on) inside, and a pan with 1-2 inches of water, for 1 hour. I use a cookie sheet or a full sheet pan, filled almost to the brim with water. This will last for the duration of your preheat and cooking time. In the oven, the pan with water will go on the bottom rack and the Dutch oven will be on the middle rack.
Step 10: Prepare to Bake! Remove the banneton from the refrigerator and remove your cover, place a piece of parchment paper over the loaf and flip. Slowly lift the banneton, up and off of the parchment paper. The loaf should be sitting nicely, ready to be scored. There are numerous ways to score your loaf and decorate it, I simply choose a half moon scoring method, but please feel free to get crafty!
*** Be EXTREMEMLY careful when opening the oven, as steam from the water will come pouring out! ***
Step 11: Now let’s get this loaf into the oven!!! Carefully open the oven and remove the Dutch Oven. Open the Dutch oven, carefully place your parchment paper and loaf into the pan, cover with the lid and place back into the oven.
*** Be EXTREMEMLY careful when opening the oven, as steam from the water will come pouring out! ***
Bake at 450 F for 30 minutes, covered.
*** Be EXTREMEMLY careful when opening the oven, as steam from the water will come pouring out! ***
Bake at 410F for 10 minutes, uncovered.
Baking the loaf covered helps to create a large, softer crumbed loaf. By lowering the temperature and baking uncovered, you develop a crispy crust and more color on the loaf. In our house, we bake for the entire time, covered. In doing so, we develop a large, soft crumbed and softer crusted loaf.
Step 12: After your baking time is completed, carefully lift the loaf out of the Dutch oven, using the parchment paper. Move the loaf to a rack to cool, carefully sliding the loaf off of the parchment paper and onto the rack. Let the loaf cool, completely before slicing, roughly 3-4 hours. It is important to leave the loaf to cool completely, no matter how difficult that is, otherwise, you will have a gummy and tacky crumb.
Step 13: Slice your loaf, I use this knife, and it cuts through the tough and crispy sourdough crust, like warm butter.
How I make Sourdough Work for Me
Day 1, at 4;30 AM: On the morning, of the day before you want to bake, get your starter(s) out of the fridge and feed it (them). For the full instructions, check out Part 1 in this series. Then I’m off to work, as I plan to do all my baking on my day off.
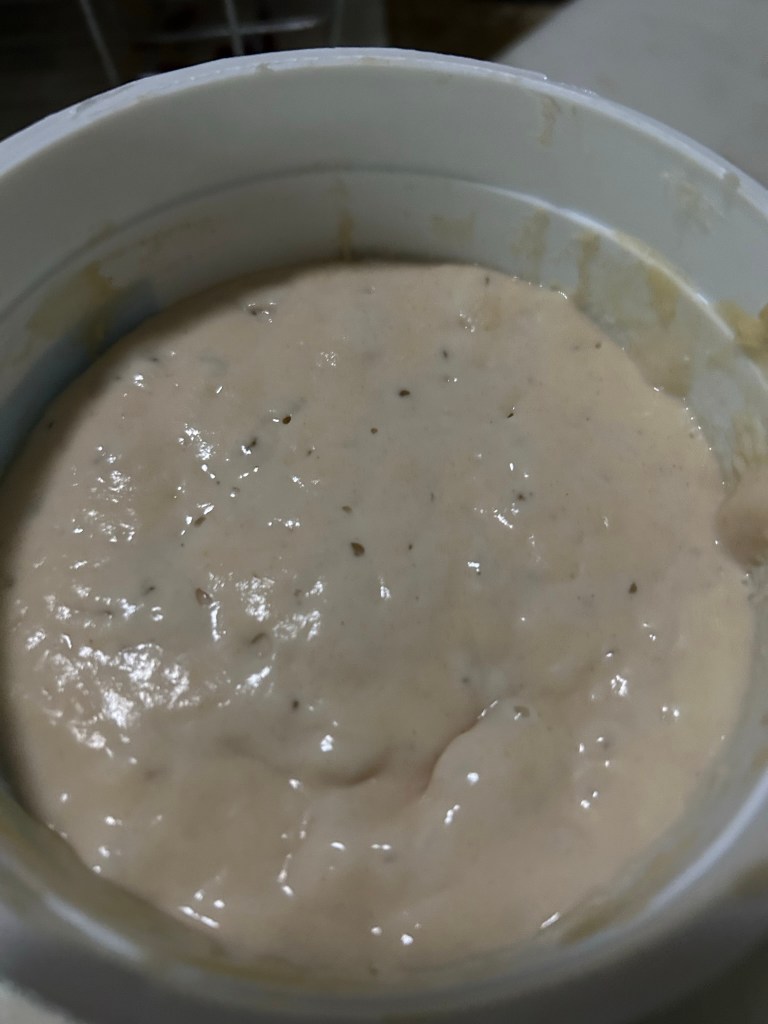
Day 1 at 5:00 PM: Once I’m home from work, yes, I work 10 hour days, I check my starters. Normally, they will have doubled in size and not have fallen. If they have fallen, that’s okay, we can still make this work. The rise and fall of the starter, for me, only happens when the temperature in my kitchen is 75F or warmer. This means that the starter is hungry, and that is okay, it just means that it will take a little longer for your bread to rise, during bulk fermentation.
This is where I start getting the loaves together, this is Steps 1 – 3, outlined above, and the English Muffins (recipe coming soon). I start by weighing out my wet ingredients, taring out the scale in between each addition. The wet ingredients are as follows:
- 100g Starter
- 20g Olive Oil
- 280g Warm Water, between 100F-110F
I then mix these ingredients, until the starter dissolves. It will look like murky water.
Next, I add the dry ingredients, and mix. The dry ingredients are as follows:
- 500g Bread Flour
- 12g Salt
Then, I dampen my hands and gently form the dough into a ball, cover and rest for 1 and 1/2 hours. This is applicable to each loaf and the English Muffins (recipe coming soon). Its okay if the rest period is slightly less or slightly more than 1 and 1/2 hours. During this first rest period, I typically make and eat dinner.
Day 1 at 6:30 PM: First I feed the starter(s) and put them back into the refrigerator and move onto Step 4, Stretch and Folds and Step 5, Rest. Check out the video (below) for full details. During this rest period, I typically cleanup from dinner.
Day 1 at 8:00 PM: This is my normal bed time, but when I have the next day off, I usually stay up until 9. Time for Step 6, Stretch and Folds and Step 7, Bulk Fermentation. It doesn’t take an hour to do work Stretch and folds into the dough, it takes minutes, place the seam side down, cover and rest 8-12 hours. As I mentioned before, I usually go to bed around 9.
Day 2 at 6:45 AM: Good Morning! After I have caffeinated and put away the dishes, I check on the loaves and English Muffins (recipe coming soon). Normally, the loaves are ready for Step 8, Shaping. I try to make shaping simple, we begin the night before by placing the seam side down, during the Step 6, stretch and folds and for Step 7, bulk fermentation.
To shape the loaf, wet your hands and gently push down the side of the dough, between the bowl, scraping down and under the ball. Continue this process until the loaf is free from the bowl. Now, gently tilt the bowl and slowly dump your loaf into the banneton, the seam side should be on top. Gently close the seam, cover the loaf and refrigerate for 6-8 hours or overnight. Please watch the video (right).

As for the English Muffins (recipe coming soon), after a night’s rest, the dough will be ready to be removed from the bowl, onto a floured surface, shaped and left to rest again.
During the cold fermentation, I am out making food, working on this blog, hanging out with friends, whatever I please.
Day 2 at 5:00 PM: Let’s move on to Step 9, Preheating the Oven and Dutch Oven. Place your Dutch Oven with Lid on, into the oven on the middle rack. On the bottom rack, place a cookie sheet, filled with water. Close the oven and Preheat to 450F for a minimum of 1 hour. While I am waiting for the oven and Dutch oven to preheat, I usually feed my piglets and play with the cats.
Day 2 at 6:00 PM: Onward to Step 10, Prepare to Bake and Step 11, Bake. Start by removing the banneton from the refrigerator and uncover. Next, take a sheet of parchment paper, roughly 12″ by 12″, place over the banneton and flip onto a hard surface. Now, slowly lift the banneton off the parchment paper, the loaf should easily release from the the banneton and hold its shape on the parchment paper. Grab your lame or sharp knife, and score your loaf. There are plenty of ways to decorate your loaves with scoring, I simply use a half moon.

*** Be EXTREMEMLY careful when opening the oven, as steam from the water will come pouring out! ***
Open your oven, carefully, giving the steam a moment or two to escape, then remove the preheated Dutch oven and close the oven. Take the lid off the Dutch oven, carefully pickup your loaf on the parchment paper and place it inside the Dutch oven. Cover the Dutch oven and carefully place the Dutch oven back into the oven and bake, as follows.
Bake 30 minutes at 450F, covered.
Bake 10-15 minutes at 410F, uncovered.
You can opt to bake for the entire 40-45 minutes covered, if you do, the crust on the loaf will be softer.
Day 2 at 6:40 PM: Take the Dutch oven out of the oven, remove the lid. Remove the loaf from the Dutch oven, using the parchment paper, and transfer to the loaf to a cooling rack. Gently slide the loaf odd of the parchment paper. Allow the loaf to cool completely, a minimum of 3-4 hours before slicing. I leave the loaf to cool overnight.
Day 3 at 4:45 AM: Carefully slice your loaf and put into a bread bag.
Enjoy!

Oh, wow, this article is great! It’s all about making the perfect sourdough loaf, and it has so many helpful tips and tricks. The author talks about the importance of using the right flour, letting the dough rise properly, and baking the loaf at the right temperature. I can’t wait to try making my own sourdough now!
Stay Blessed – Mel
Free Keto Diet Recipes – http://www.ketodietrecipes.co.uk
LikeLike